Auto flight by following the waypoints set in Mission Planner when use Radiolink PIX6, PIXHAWK,CrossRace Pro, CrossRace, CrossFlight-CE, CrossFlight, Mini Pix
This manual is for how to set up flight waypoints in Mission Planner to make the drones/fixed-wing/cars/boat move automatically come true.
1. Takeoff Point Positioning
(1) Open the Map in Mission Planner
① Connect the Mission Planner success
② Click the “FLIGHT PLAN” in the Mission Planner. Make sure the internet of your computer is work normal ensure to load the map success.
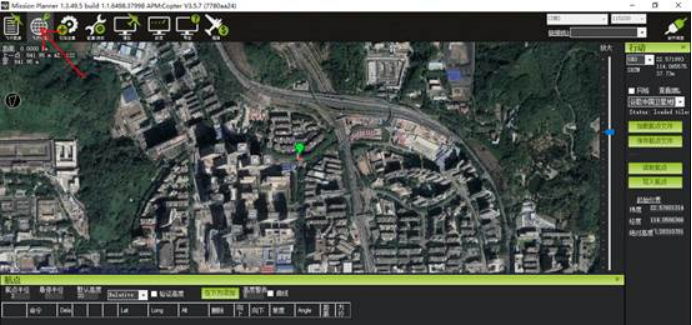

(2) Find your position
How to find your position?
Click the select box at the right of the Mission Planner, select the Google Map(谷歌地图).
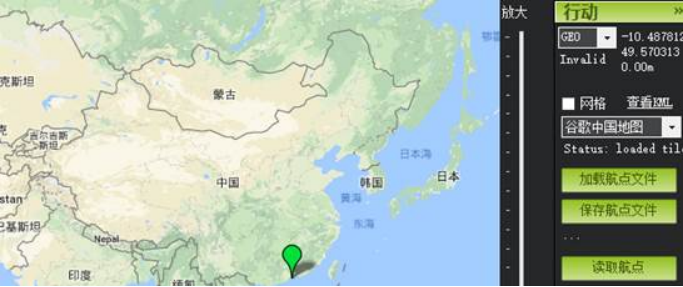

Hold the left button of the mouse and then drag the map to the place you are interested in into the center of the map. You can zoom the map by sliding the mouse wheel or changing the scale on the right column.
(3) Select the Takeoff (HOME) Point
After finding the destination, move the mouse to the point that you are interested in and right-click the mouse. A select box will pop out, select “Set Home Here” at the bottom of the select box.
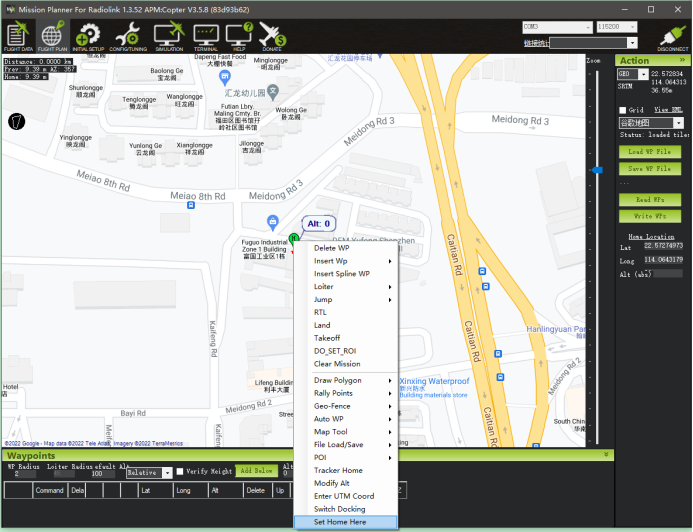

The address marker will be set to the corresponding location on the map. So that you can quickly find the address even switch map types later.
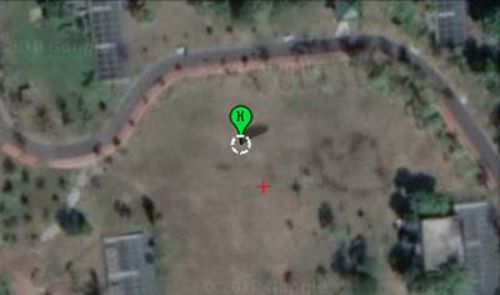
H point has been marked.
After the H point have been marked, you can switch the map type to Google Satellite Maps(谷歌卫星地图).
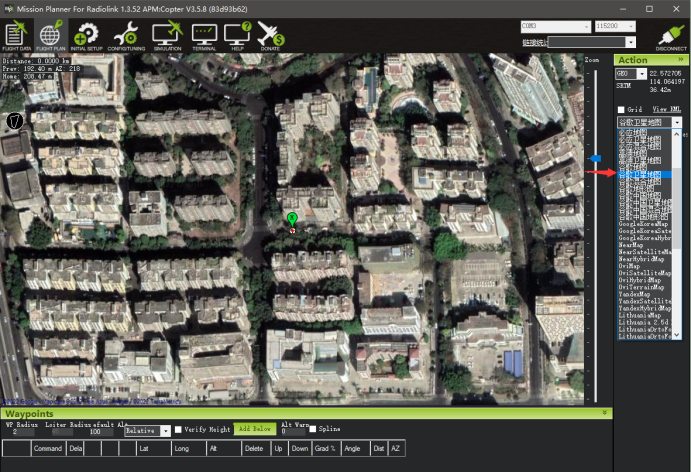

At this point, we have found and marked our flight field.
The H coordinate point can also be dragged to any position you want by left-clicked the mouse, such as a clearing.

2. Set the waypoints
Set waypoints 1,2,3,4 as an example, the setting steps as below:
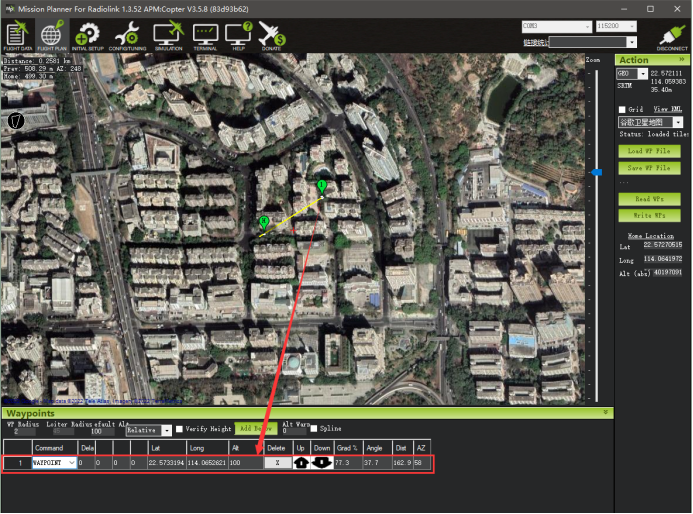
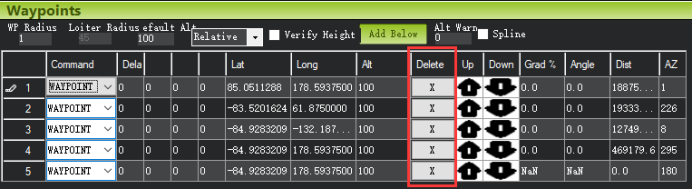
Left-click the mouse on the map to mark the first waypoint, the mission planner will mark the latitude, the longitude, the distance, the grand of the first waypoint, etc. automatically, the information can check on the bottom of the Mission Planner.

The number of the waypoints can be set as much as you want.
Let us mark the waypoints 2,3,4

The GPS coordinates are determined, and then the flight altitude needs to be set.
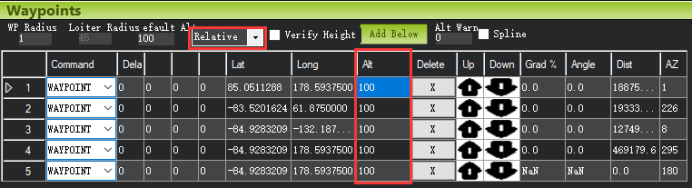

Relative is suggested to be selected, that is, the altitude relative to the take-off point.
Move the mouse to the Alt setting box, double left-click it can set the altitude for the corresponding Waypoints.
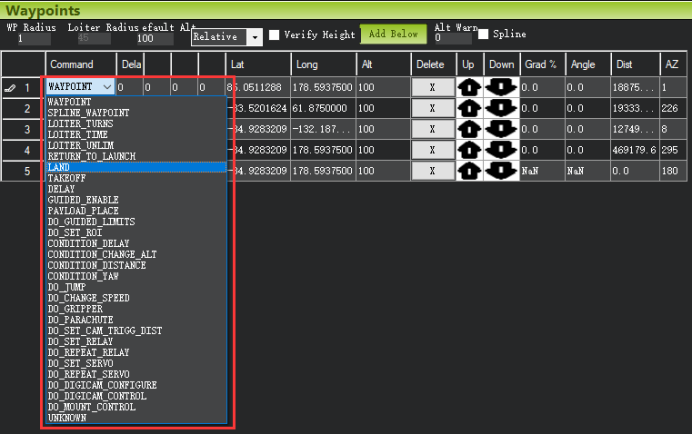
The next one that needs to be introduced is the command.
For example, the WAYPOINT.
The WAYPOINT is the most basic waypoint command, the aircraft will go to the first point as the command asked, and then to the second point till finished all the waypoints.
There are other commands such as LAND, TAKEOFF, DELAY, etc. that can be selected. If set the command as LAND, that is means the airplane will land automatically at this waypoint.

The excrescent waypoints can be deleted by clicking “X” below the “Delete” on the Mission Planner.

3. Write the Waypoints
After finishing all the waypoints, click “Write WPs” at the right of the Mission Planner to save the settings.

You can check whether the waypoints that have been set are consistent and correct by clicking the “Read WPs” on the right of the Mission Planner.
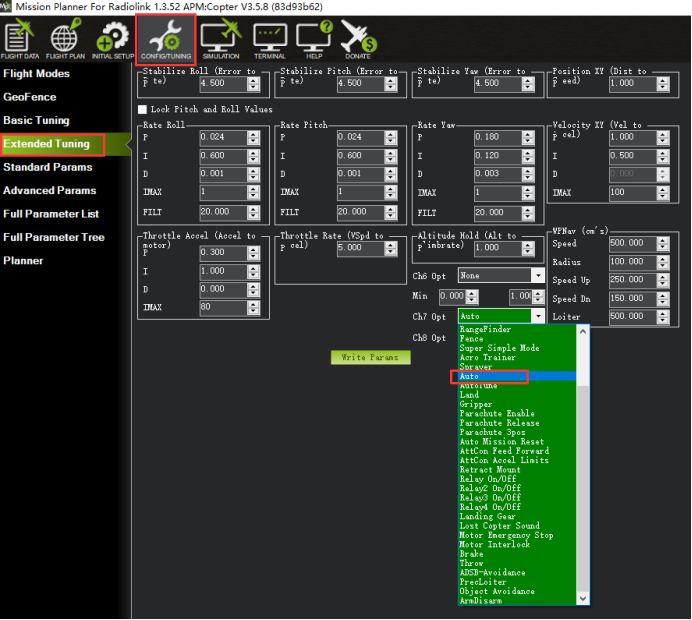
4. Execute the waypoints
Load success the waypoints have set by clicking the “Read WPs”; you must set the flight mode to Auto in the Mission Planner.
The setting steps are as below:
① Click “CONFIG/TUNING”
② Click “Extended Tuning”
③ Select the Ch7 Opt is Auto
④ Set a 2-way switch in the AUX-CH menu of the transmitter to control the CH7, turn on or turn off the Auto Flight function by press the 2-way switch.

Take the Quadcopter as an example:
Prerequisites: The parts of aircraft such as frame, flight controller, GPS, motors, ESCs, propellers, etc. are installed correctly, the firmware has loaded success and the parameters setting are completed, and the Quadcopter can take off and fly normally.
Auto Flight function setting steps:
① In a clearing area, turn on the transmitter and then power on the Quadcopter. Wait for the flight controller to start up.
② Wait about 2 seconds till the GPS search more than 12 pieces of satellites.
③ Switch the transmitter to PosHold mode, press the safety switch of the flight controller, and then Arm.
How to Arm?
Throttle on left (Mode 2): Toggle the left joystick to the lower right corner and hold this position for 3 seconds till the propellers of the Quadcopter start to rotate.
Throttle on right (Mode 1): With the right joystick at the bottom, toggle the left stick to the right and hold this position for 3 seconds till the propellers of the Quadcopter start to rotate.
Attention: if failed to Arm, it indicates that the number of satellites and the positioning accuracy do not meet the requirements, waiting till the GPS search more than 12 pieces of satellites.
④ After the Quadcopter take-off with PosHold mode, you can press the switch of CH7 (we have set it as the Auto Flight function switch before) to make the Quadcopter flight automatically as the waypoints we have set.
More details about the transmitter and flight controller can check on the official website from Radiolink:
Official website of Ardupilot can click the link below:
Official Mission Planning from Ardupilot can click the link below:
http://ardupilot.org/copter/docs/common-planning-a-mission-with-waypoints-and-events.html